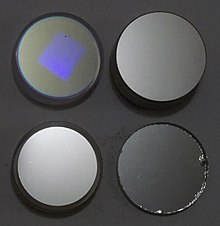
Surface quality is a measure of surface defects on optical surfaces such as lenses or mirrors. They can be caused during the manufacturing of the part or handling. These imperfections are part of the surface and cannot be removed by cleaning. A specification that is thought of as standard is often used, such as 60-40 and an RMS (root mean square) of 3 angstroms, without considering the cost of achieving it or the damage to the system if it is not achieved.[1] A demanding standard results in a higher cost of the optical components, so it is important to understand what is required and avoid over-characterization.[2][3]
These defects are called by the traditional name "Cosmetic Defects", but they are not always purely cosmetic: optics designed for laser applications tend to be more sensitive to surface quality since these imperfections can be starting points for the development of laser-induced damage. Another reason for the importance of defects is that, in some cases, imperfections in optical elements will be directly imaged as defects in the image plane. In addition, optical systems for which maximum radiation intensity is necessary tend to be sensitive to loss of power as a result of surface scattering caused by such imperfections. In general, systems operating in the ultraviolet range require a more demanding standard than systems in visible or infrared light, since the shorter wavelength of the ultraviolet radiation is more affected by scattering.
There are many different standards in use by the community of optical element manufacturers, designers and users. All of those standards define how to specify and how to test the various optical elements. However, different geographic regions and different industries tend to use different standards. For example, German manufacturers are known for their fondness for ISO 10110, while the US military developed MIL-PRF-13830 and used it for many decades, making it the de facto global standard.[3] The issue of scratches is particularly complicated because it is not always possible to translate the scratch grade by one standard to another and sometimes the translation ends up being statistical (sampling defects to ensure that statistically, the percentage rejected elements will be similar in both methods).[4]
Examining surface quality in terms of Scratch and Dig is a skill and specialization that takes a considerable amount of time to develop. The common practice is by comparing the element to a standard master (reference).[3] Nowadays, there are automated systems that replace the human technician, mainly for flat optics, but recently also for convex and concave lenses.[3][5]
Roughness characterization is carried out using more precise and easier to quantify methods.
- ^ Aikens, David M. "Meaningful Roughness & Quality". savvyoptics.com. Retrieved 3 December 2023.
- ^ "Understanding Surface Quality Specifications". edmundoptics.ca. Retrieved 3 December 2023.
- ^ a b c d Aikens, Dave. "Optics Surface Quality Solutions:The scratch and dig revolution, 2019" (PDF). savvyoptics.com. Retrieved 3 December 2023.
- ^ Aikens, Dave. "New Options for Optical Quality Tolerances - Savvy Optics". www.savvyoptics.com. Retrieved 2023-12-04.
- ^ "Scratch/Dig Measurement - Optics Metrology - Metrology & Microscopy". www.lambdaphoto.co.uk. Retrieved 2023-12-04.
© MMXXIII Rich X Search. We shall prevail. All rights reserved. Rich X Search
